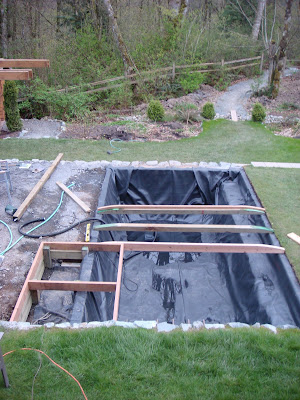
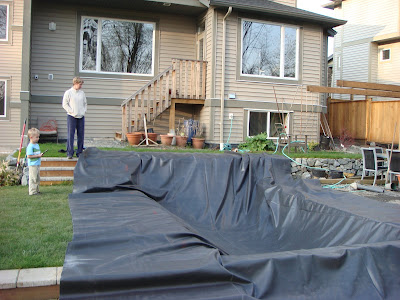
Posts

Showing posts from April, 2008

Building the bridge

Image
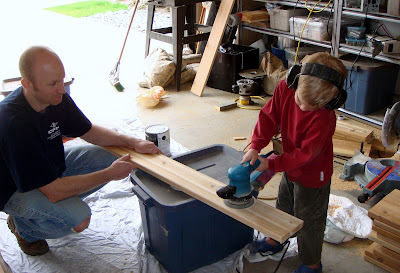
The boys do some sanding. These are the cross pieces for the bridge. Here's the bridge in place. It was stained with Behr's natural stain. After putting it all together I'm thinking that the bridge is too much. It looks nice enough but all I see is bridge. It stands out so much that it seems to eclipse the entire pond. I'm now thinking about what to do about it. Perhaps staining it a dark colour, even black? Another option would be to drill holes in each plank. 8 -10 per plank ... drilled and routered ... yikes, that's a lot of work! As I was sketching out some ideas I also figured out that the bridge needs to be raised a bit to let surface debris make it to the skimmer. That thought led me to think about putting the skimmer under the bridge. Then I'd need to make some sort of access hatch in the bridge. Oh man, just when I thought this part of the project was done.

Bridge building

Image
We drained the pond (sadly) and started building the bench (left) and the bridge (center).

Time for some H20

Image
The liner is in! We put in 2 layers of underlay first, then the liner. Time to fill 'er up. We babysat the liner and kept shifting it to smooth things out. We trimmed the edges and filled up the pond. It is level to 2mm (1/16"). You can see the waterfall in the background. The sound was fantasic! Now we need to drain it to put in the bridge and build the bench. It's such a waste of water, but necessary.

Buiding a frame.

Image
The pond is about 15000 liters (4000 gallons) and 1.5 meters (5ft) deep at the lowest point. For this pond, we decided that a treated wood frame would make an ideal attachment point for the pond liner. On one side there was a lot of gravel so concrete footings were used to keep the 4x4 posts level and solid. 3ft rebar was pounded through the posts at 2ft intervals. Once the liner is in, cedar 2x6 boards will cover the liner and create a small overhang around the pond. There will also be a 4ft wide bridge spanning the center, to access the patio. There will be a bench that hangs over the pond in one corner. All pipes, electrical and other connections will be built inside the bench and hidden from view. This means that the liner doesn't need to be punctured for bulkhead fittings. The entire design also means that the liner can be removed or replaced fairly easily. Just remove the cedar trim and pull out the liner. We're working on a design for an in-pond skimmer that will also hi

The hole is done!

Image
We actually ended up going down another foot on one side to create a slope but at this point you can get an idea on the size.

Let the excavation commence!

Image
You can see the outline of the pond from the string-lines The whole family gets involved